


Smokey Eyes Made Easy by Kim O’Sullivan

Hi Everyone,
Happy Saturday!
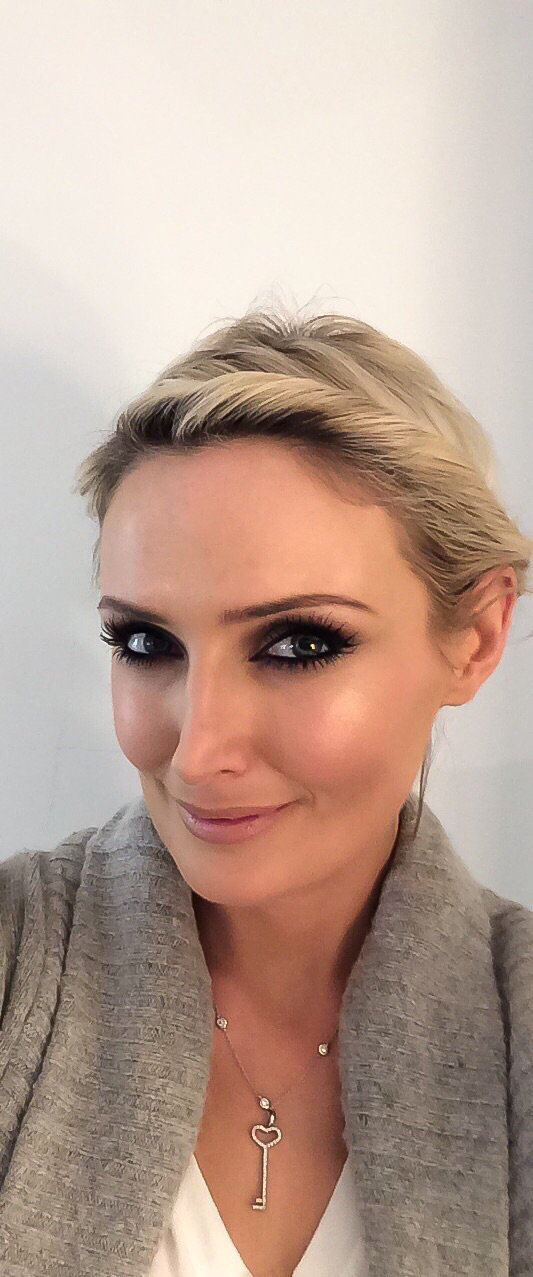
For a little change this week, I asked my good pal Kim O’Sullivan to do a guest blog post for us. Kim has been a professional make up artist for 15 years. She is one of the best in my opinion and not to mention a HD brow queen. She is also a busy Mum and loves a bargain (she’s so good at finding them!) Today she’s created a quick, easy and very affordable smokey eye look to share with us.
I hope you enjoy it.
Leave us a comment below or on Facebook.
Much love
Px
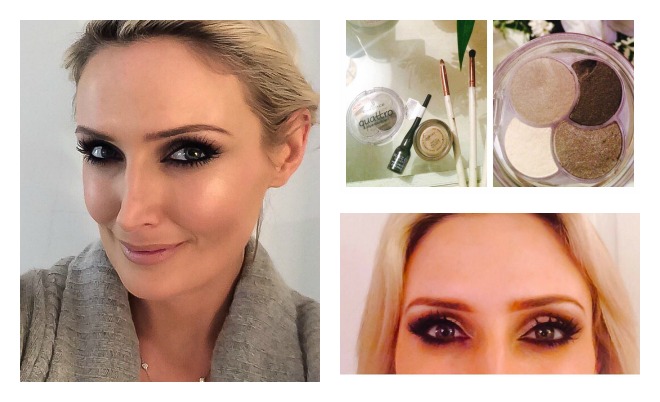
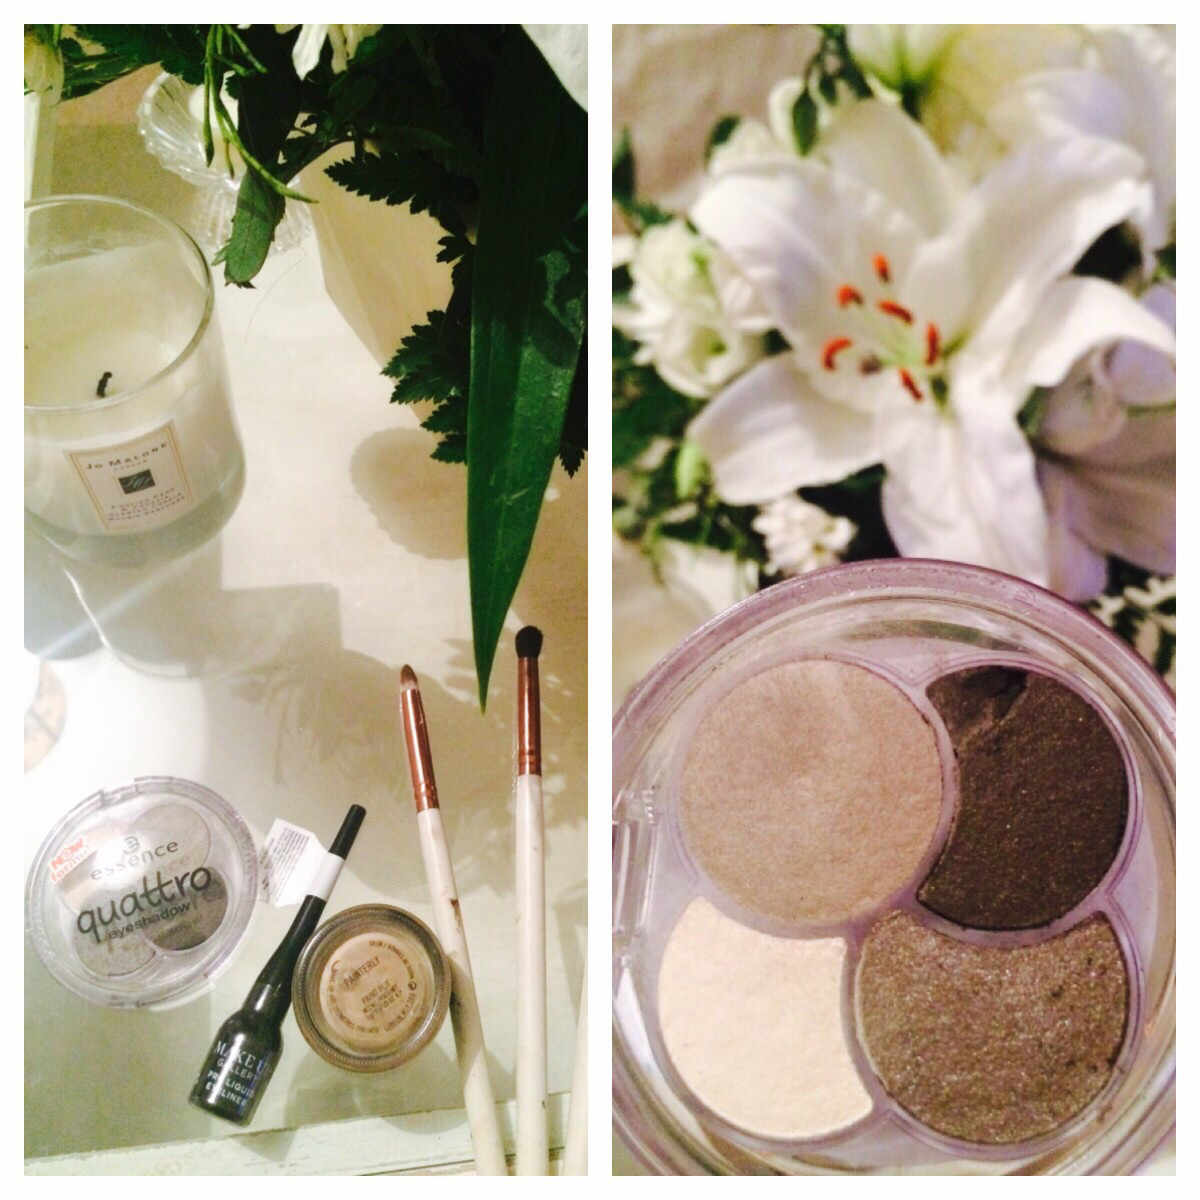
Products used:
MAC paint pot in ‘Painterly’: I adore this. It’s a must-have product and the pro secret that ensures incredible lasting staying power.
Essence Quattro eyeshadow palette: I chose this palette because the colours are suitable for all skins tones and hair colours. Despite only being €3.50 from Penneys, the quality and texture of these eyeshadows were super easy to work with as they blend so beautifully.
Make Up Gallery pro liquid liner: This liquid liner is just €1.49 in Dealz, and it pleasantly surprised me. It was jet black, a dream to work with. And it lasted, which was an added bonus!
Max Factor Masterpiece mascara: My go-to mascara of choice at the moment. It’s amazing and will guarantee luscious long lashes.
Now onto the tutorial for Smokey Eyes made easy…
STEP 1
I prepped my Lids with an eye primer (MAC paint pot).
Apply using your ring finger from lash line to brow bone.

STEP 2
Using a large brush apply the lightest colour from the Quattro palette to the entire lid up to the brow bone, not forgetting the inner corner (to brighten & illuminate the eyes).
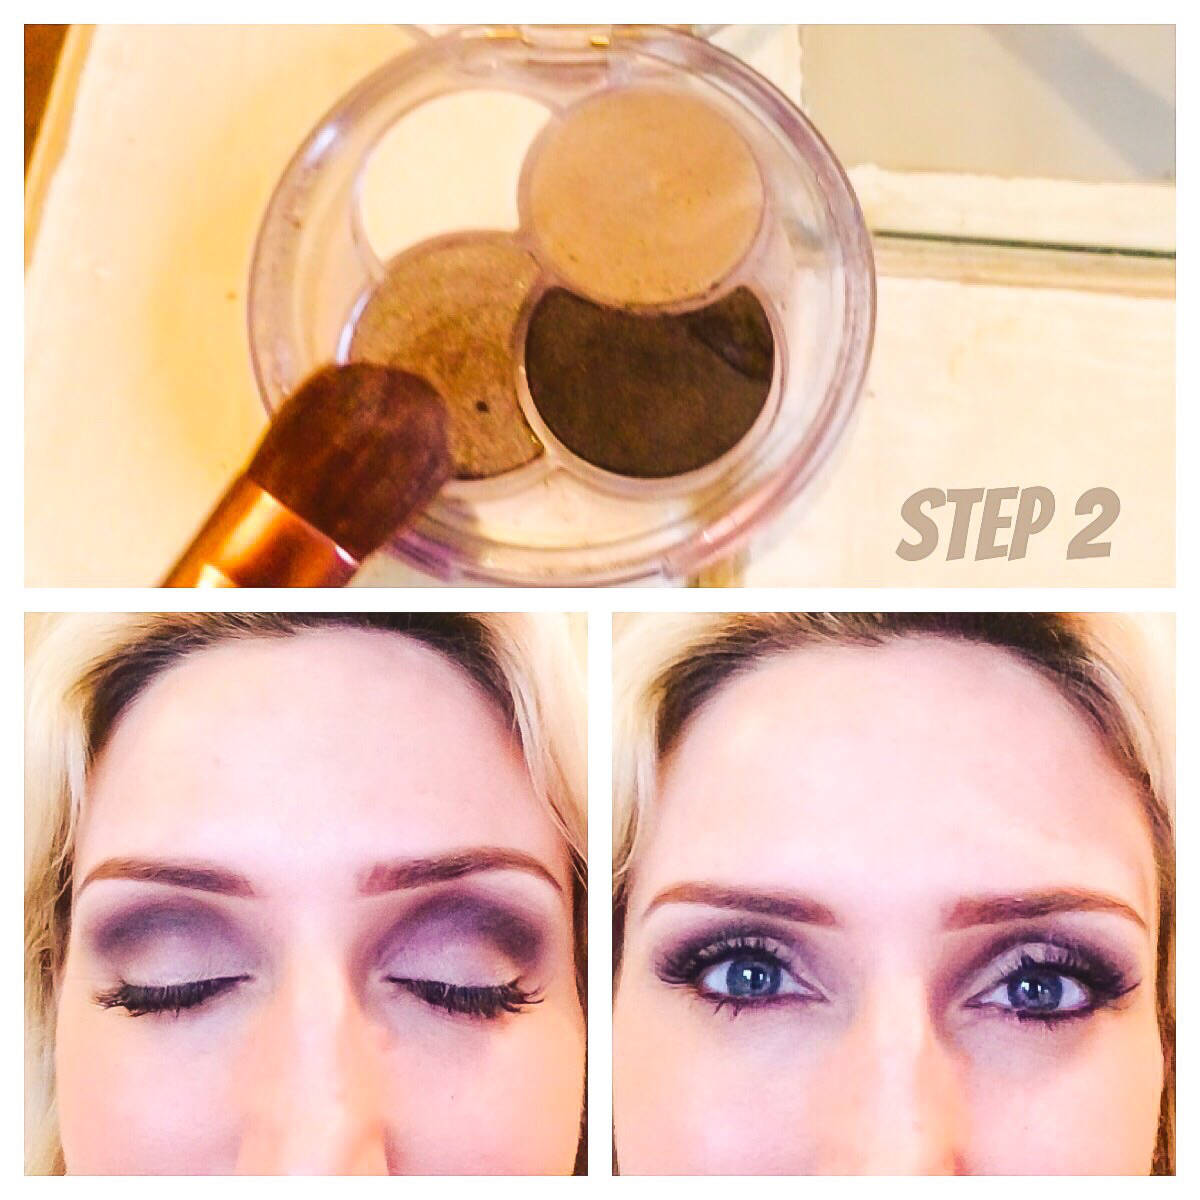
STEP 3
Using the darkest shade from the palette and a small precision brush as your tool, carefully press the product onto the top and bottom lash line, paying special attention to the corners.
When applying the colour to the lower lash line you can choose to apply to just the outer corner or, like I have done, you can blend all the way across to add drama and intensity.

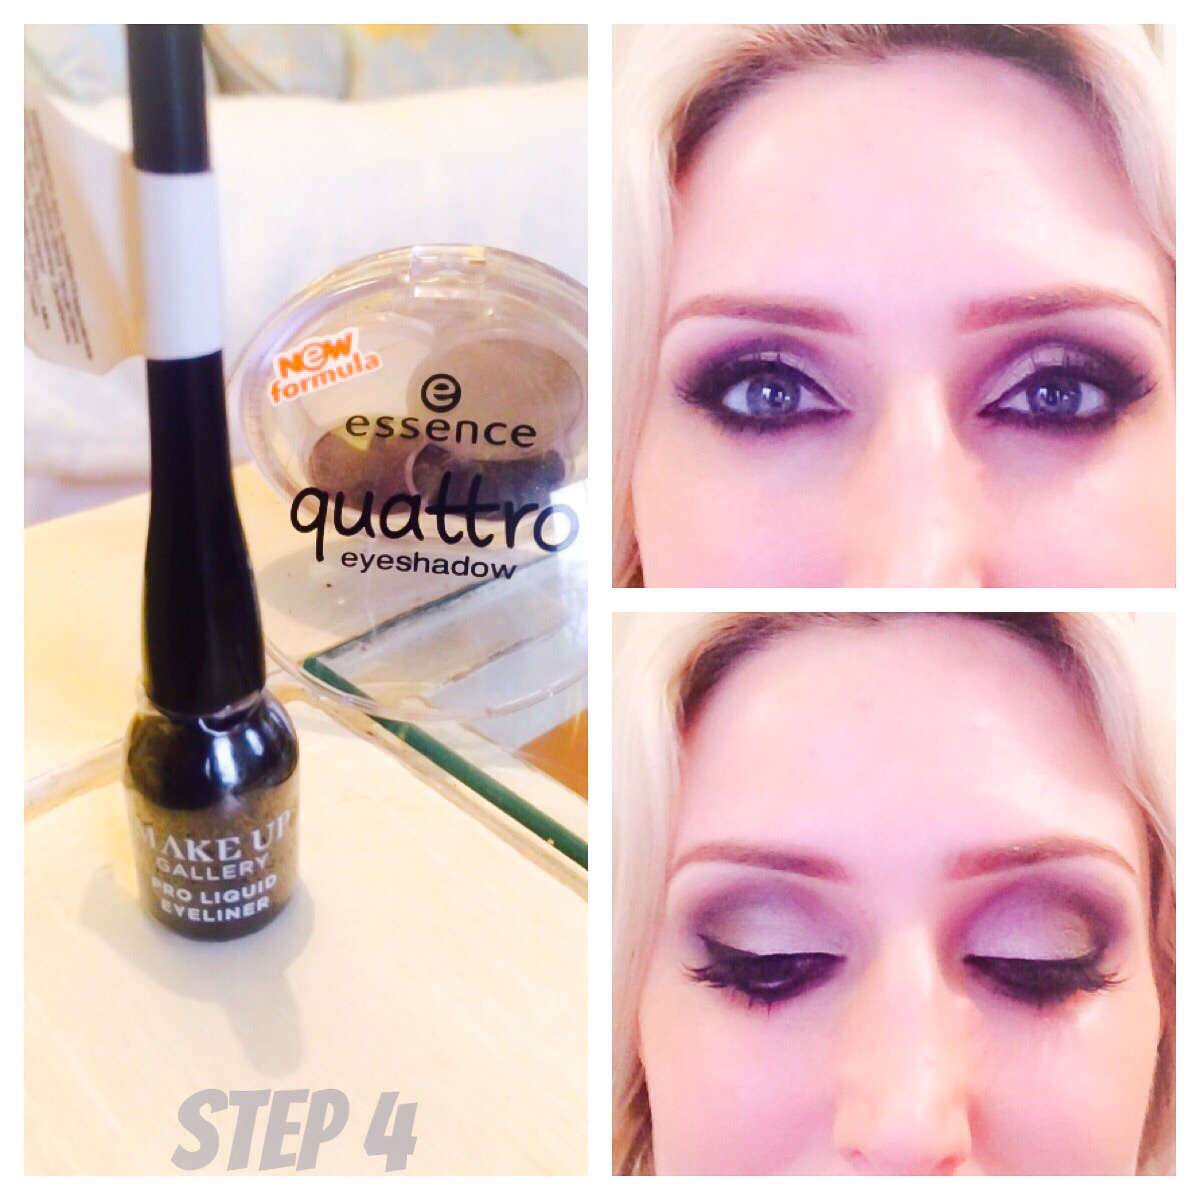
STEP 4
Next we add the liquid liner for a real eye opening ‘wow’ effect.
Taking your time, start from the inner corner and brush outwards – I find the best way to apply it is instead of trying to draw a line in one clean sweep, is to imagine you’re joining the dots and slowly press on in really small lines.
STEP 5
Pro tip: It’s very difficult to create that perfect clean winged liner… unless you have help that is! 🙂 Using a little sellotape, or like I did, take the white sticker off the lid of the liquid liner, and stick it on. Simply run the pen along the edge of the sticker, give it 30 seconds to dry and slowly peel off. Ta-da. A super perfect winged liner that would rival any professional’s effort.
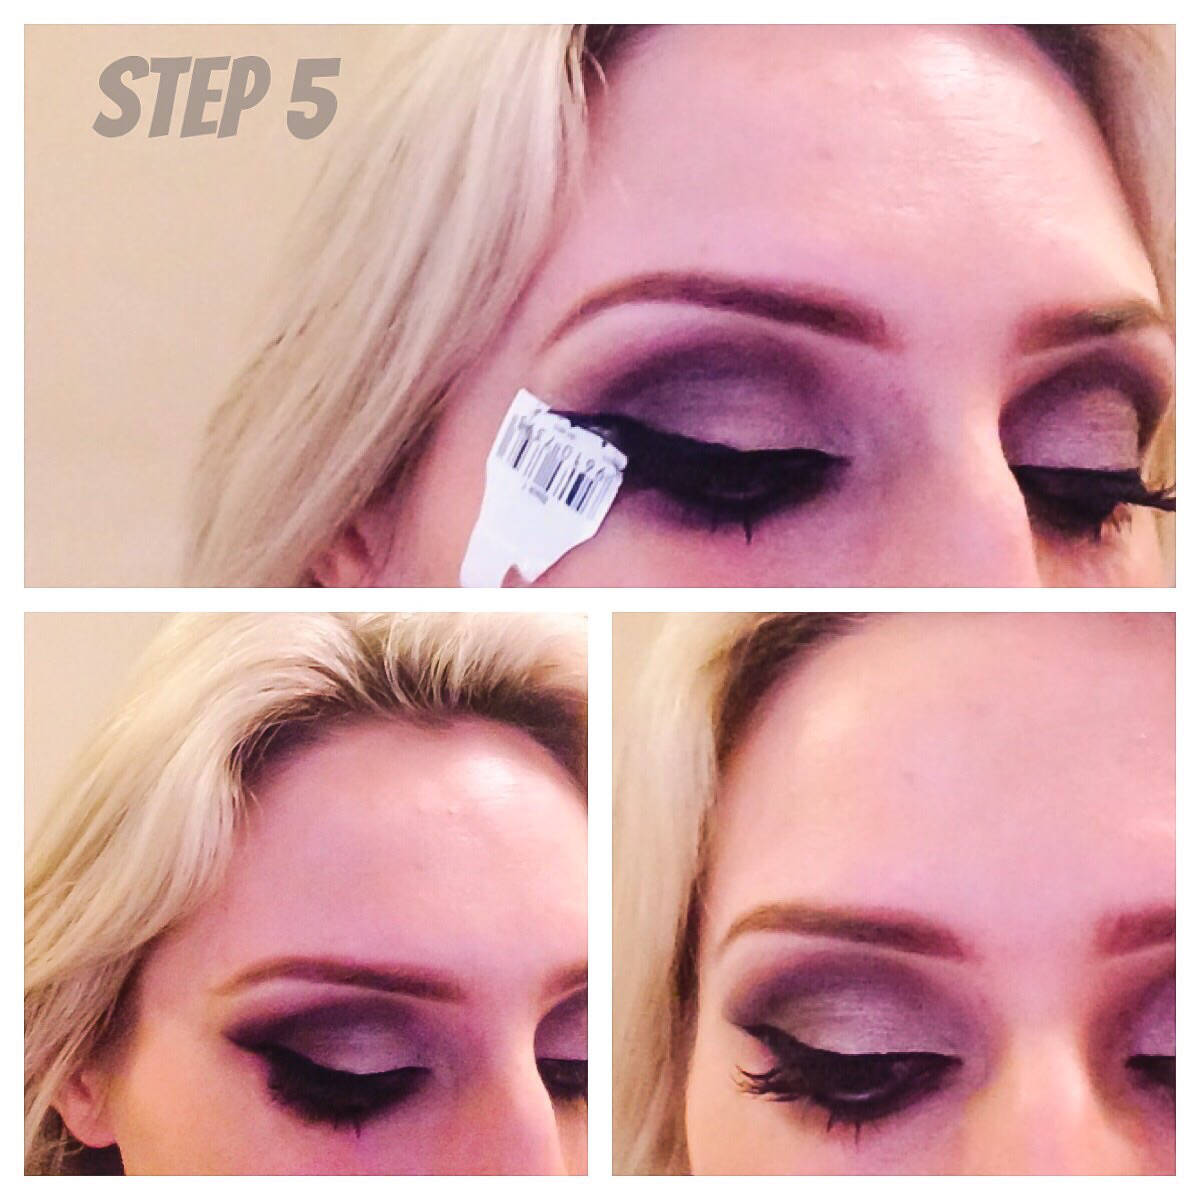
Another pro tip: While the liquid liner is still a little wet right after application, smudge it in if you prefer a softer defined liner versus a sharp liquid line.
STEP 6
Add lashings and lashings of mascara to upper and lower lashes.

Pro tip: After applying your mascara, use the point of the wand and precisely colour over the ends/tips of the lashes, not forgetting the awkward little ones at either corners of the lash, which the wand can sometimes miss!
Introducing The Pippa Palette
Demo Slider
related articles
Daytime Make Up Look
Hi there! I haven’t done an up to date daytime make up post in ages. So this morning while putting on my make up I
Winter Make Up Must-Haves!
Happy Sunday! As winter creeps its way closer and closer towards us, it’s time to switch up our makeup looks. Whether

Christmas in Dubai
If you follow my Snapchat especially you’ll know I spent Christmas away with my husband and our two boys. We decided to